Windows are not just functional elements of a home—they’re also design statements that affect aesthetics, lighting, ventilation, and energy efficiency. Choosing the right window size ensures comfort, visual harmony, and cost-effectiveness. Whether you are replacing existing windows or installing new ones, accurate measurements are crucial. Improper sizing can lead to drafts, poor insulation, and increased costs. This guide will take you through step-by-step window measuring techniques, explain standard window sizes, and provide practical tables for easy reference.
Why Accurate Window Measurement Matters
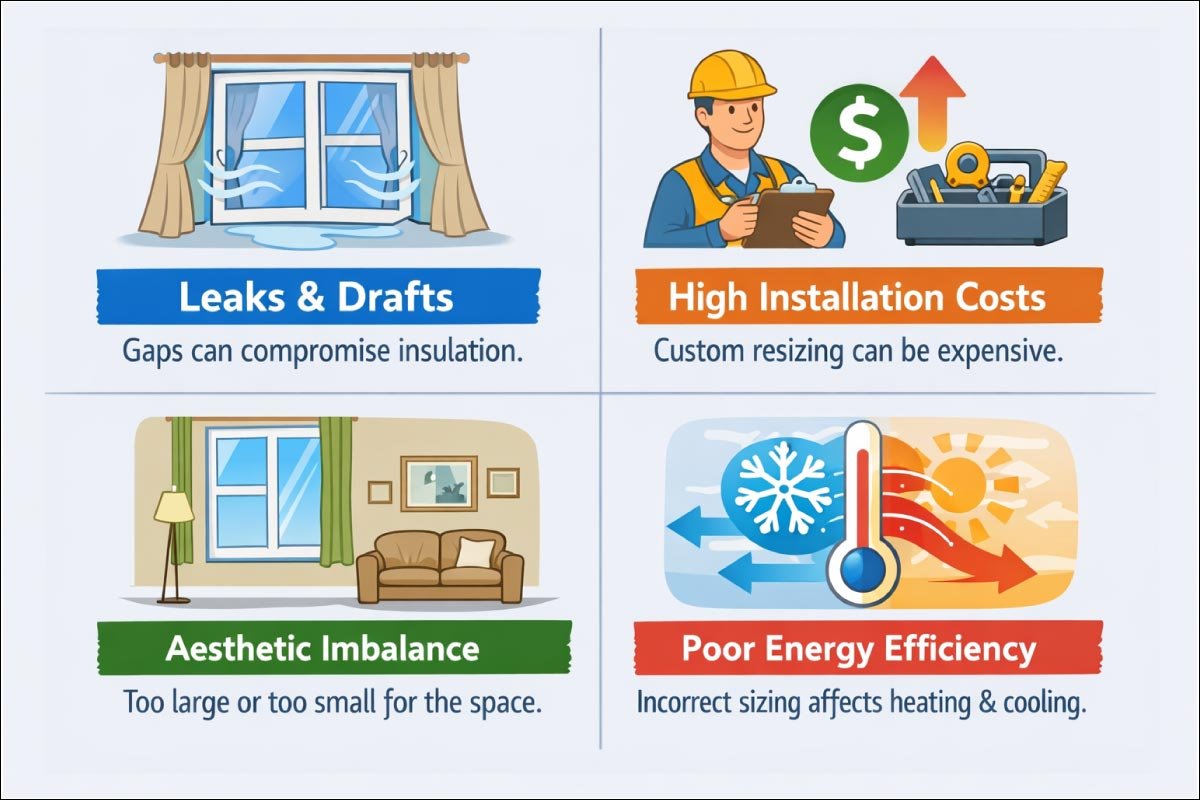
Measuring windows correctly is crucial for both functionality and appearance. Precise measurements prevent installation headaches, ensure energy efficiency, and maintain your home’s aesthetic balance. Even small errors can lead to drafts, costly adjustments, and visual inconsistencies, making accuracy an essential first step in any window project.
-
Leaks and drafts: Gaps can compromise insulation.
-
High installation costs: Custom resizing can be expensive.
-
Aesthetic imbalance: Windows that are too large or small disrupt the visual flow of your room.
-
Poor energy efficiency: Incorrect sizing may affect heating and cooling efficiency.
By following a systematic measuring process, you ensure a precise fit that maximizes function, aesthetics, and energy savings.
Tools Needed for Measuring Windows
Accurate window measurement starts with the right tools. Using proper equipment ensures precise dimensions, reduces errors, and makes the process faster and easier. Preparing tools in advance allows for a smooth workflow, whether measuring standard or large, hard-to-reach windows.
-
Measuring Tape: A reliable steel or fiberglass tape measure for precise dimensions.
-
Pencil and Paper: To record measurements accurately.
-
Level: Ensures your window frame is straight, especially important for replacement windows.
-
Step Ladder: For high or hard-to-reach windows.
-
Laser Measure (Optional): Provides faster and precise digital measurements, ideal for larger windows.
Having the right tools ready prevents errors and makes the measuring process more efficient.
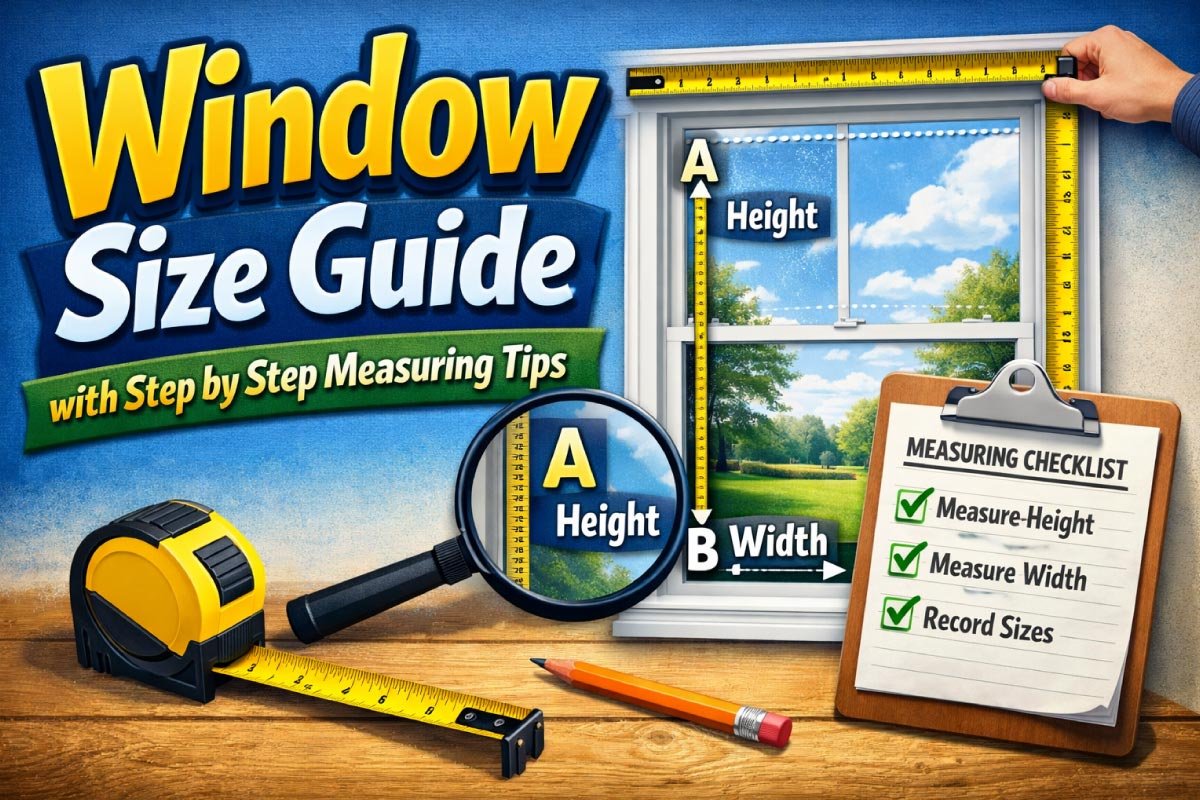
Measuring Window Width
Measuring the width accurately is crucial for a proper window fit. Taking multiple measurements ensures precision and prevents installation issues. Whether for replacement windows, blinds, or curtains, recording the smallest value guarantees a snug and functional fit, avoiding gaps or resizing challenges.
Steps:
-
Measure the width at the top, middle, and bottom of the window frame.
-
Record the smallest measurement to ensure the new window fits snugly.
-
If you are measuring for curtains or blinds, measure from edge to edge of the frame or desired coverage area.
Pro Tip: Always measure in inches and double-check each dimension. Even a 1/8-inch difference can affect fit.
Standard Window Widths
Choosing the right window width is essential for both functionality and aesthetics. Standard widths vary by window type, influencing light, ventilation, and overall room design. The following table outlines common widths for popular window styles, helping homeowners and builders select options that balance practicality, style, and spatial requirements.
| Window Type | Standard Width (inches) | Notes |
|---|---|---|
| Single-Hung | 24, 28, 32, 36 | Most common in bedrooms |
| Double-Hung | 28, 32, 36, 40 | Versatile for living rooms |
| Sliding | 36, 48, 60 | Horizontal sliding |
| Casement | 16, 20, 24, 28 | Opens outward, needs clearance |
| Picture/Fixed | 24, 36, 48, 60 | Non-opening, decorative |
Measuring Window Height
Accurate height measurement is just as important as width for a proper window fit. Measuring at multiple points ensures precision and avoids gaps or misalignment. Whether for replacement windows, new construction, or window treatments, recording the smallest value guarantees a snug, functional, and visually balanced installation.

Steps:
-
Measure from the top of the sill to the inside top of the window frame.
-
Take measurements at left, center, and right sides.
-
Use the smallest measurement to ensure proper fitting.
-
For blinds, curtains, or shades, measure the full height needed including any desired overhang.
Standard Window Heights
Window height impacts both the visual appeal and functionality of a room. Different window types have standard heights that accommodate ceiling height, ventilation needs, and design preferences. The table below highlights typical window heights, helping homeowners and builders choose options that enhance light, airflow, and overall interior balance.
| Window Type | Standard Height (inches) | Notes |
|---|---|---|
| Single-Hung | 36, 44, 52, 60 | Heights vary by ceiling height |
| Double-Hung | 44, 52, 60, 72 | Allows larger opening for ventilation |
| Sliding | 24, 36, 48 | Lower heights for sliding doors |
| Casement | 36, 48, 60 | Ensure clearance for outward swing |
| Picture/Fixed | 36, 48, 60, 72 | Decorative, non-opening |
Measuring Window Depth
Measuring window depth ensures a proper fit within the wall and accommodates insulation or trim. Accurate depth measurements prevent installation issues and help select compatible replacement windows or inserts. Taking careful measurements guarantees both structural integrity and a clean, flush appearance once the window is installed.
Steps:
-
Measure the thickness of the wall where the window will be installed.
-
Record the interior trim depth and exterior siding if relevant.
-
Consider insulation space for energy-efficient windows.
Tip: If replacing an older window, check if the new window manufacturer requires exact frame depth for proper installation.
Common Window Depths
Window depth determines how a window fits within a wall and affects insulation, frame strength, and overall appearance. Different materials and designs have standard depths to balance durability, energy efficiency, and aesthetics. The table below outlines common window depths, guiding homeowners and builders in selecting the right option for their space.
| Window Type | Standard Depth (inches) | Notes |
|---|---|---|
| Vinyl Windows | 2.5 – 3.5 | Lightweight, easy to install |
| Aluminum Windows | 2.0 – 3.0 | Slimmer frame, durable |
| Wood Windows | 3.0 – 4.0 | Adds insulation, aesthetic appeal |
| Fiberglass | 3.0 – 4.5 | Energy-efficient, low maintenance |
| Double-Pane Inserts | 2.5 – 3.5 | For replacement projects |
Additional Measurements for Special Windows
Specialty windows require extra care and precise measurements to ensure proper fit and functionality. Unique shapes, angles, or features must be accurately recorded to avoid installation errors. Careful documentation guarantees that replacement windows, custom grids, or skylights align perfectly with your design and structural requirements.
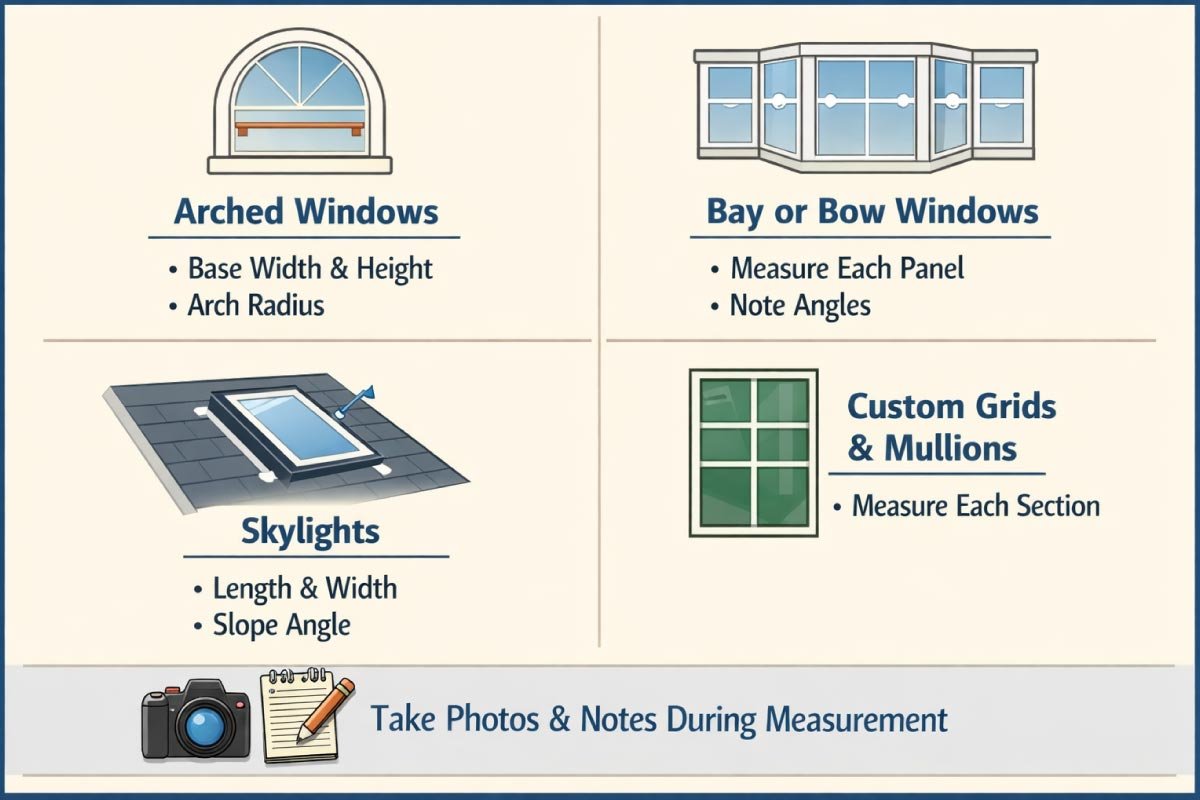
Some windows have unique shapes or features requiring extra measurements:
-
Arched Windows: Measure the base width and height plus the arch radius.
-
Bay or Bow Windows: Measure each panel individually and note angles between sections.
-
Skylights: Measure length, width, and slope angle.
-
Custom Grids or Mullions: Measure each section separately for accuracy.
Pro Tip: Take photos and notes during measurement—this ensures accuracy and helps installers understand the configuration.
Recording and Double-Checking Measurements
Careful recording and verification of window measurements are essential to avoid costly mistakes. Documenting each dimension clearly ensures installers have accurate information. Double-checking measurements for each window, even if they appear identical, guarantees a precise fit, smooth installation, and prevents delays or additional expenses.
Accurate recording is essential. Mistakes often happen due to poor documentation.
Steps:
-
Use a notebook or measurement sheet to record width, height, and depth.
-
Note measurement points: top, middle, bottom, left, center, right.
-
Double-check all numbers before ordering windows.
-
For multiple windows of the same type, measure each individually to account for small variations.
How Window Size Affects Room Design
Window size is a critical factor in shaping a room’s overall look, comfort, and functionality. It determines how much natural light fills the space, influences airflow, and impacts energy efficiency. Beyond practical concerns, window proportions contribute to the room’s visual harmony, framing views and balancing architectural elements for a cohesive, well-designed interior.
1. Maximizing Natural Light with Window Dimensions
The size of a window significantly affects the amount of sunlight entering a room. Larger windows brighten interiors, enhance mood, and make spaces appear more open. Smaller windows may create a cozier feel but can limit daylight, requiring artificial lighting. Strategic placement and sizing ensure optimal light distribution throughout the day for functional and aesthetic purposes.
2. Improving Ventilation Through Window Height and Width
Window dimensions directly influence airflow and ventilation within a room. Taller or wider operable windows allow more fresh air circulation, improving indoor air quality and comfort. Conversely, small or poorly positioned windows may restrict airflow, causing stuffiness. Careful consideration of size, placement, and opening mechanisms ensures efficient ventilation and a healthier indoor environment.
3. Enhancing Energy Efficiency and Insulation
Properly sized windows contribute to energy savings by minimizing heat loss in winter and heat gain in summer. Oversized windows without insulation can create drafts, increasing energy bills, while smaller, well-fitted windows maintain temperature control. Selecting the right size, combined with quality glazing, helps optimize energy efficiency while keeping the room comfortable year-round.
4. Balancing Room Proportions and Visual Appeal
Window size affects the perceived scale and symmetry of a room. Large windows can make a space feel airy and expansive, while smaller ones create intimacy. Proportions that align with walls, furniture, and architectural details enhance visual balance. Thoughtful sizing ensures the room looks cohesive, highlighting key design elements and framing external views attractively.
5. Influencing Interior Layout and Furniture Placement
The dimensions of a window can impact where furniture and décor are placed. Large windows may limit wall space for storage or artwork, while smaller windows provide flexibility. Designers must consider window height and width to optimize functional layouts without obstructing natural light. Proper planning ensures a harmonious balance between style, usability, and comfort.
Recommended Window Sizes by Room Type
Selecting the right window size for each room enhances comfort, lighting, and functionality. Different spaces have unique requirements for width and height to balance natural light, privacy, and airflow. The table below provides recommended window sizes by room type, helping homeowners make practical and visually appealing choices throughout their home.
| Room Type | Recommended Width (inches) | Recommended Height (inches) | Notes |
|---|---|---|---|
| Bedroom | 36 – 48 | 44 – 60 | Balanced light and privacy |
| Living Room | 48 – 72 | 52 – 72 | Creates open, bright spaces |
| Kitchen | 24 – 48 | 36 – 60 | Focused light over counters |
| Bathroom | 24 – 36 | 36 – 48 | Consider privacy and ventilation |
| Hallway/Stairs | 24 – 36 | 36 – 60 | Narrow and functional |
Common Mistakes to Avoid
Avoiding common measuring errors saves time, money, and frustration. Even small inaccuracies can lead to ill-fitting windows, drafts, or costly adjustments. By understanding frequent pitfalls and taking careful, repeated measurements, you ensure a smooth installation process and perfectly fitted windows that look and perform as intended.
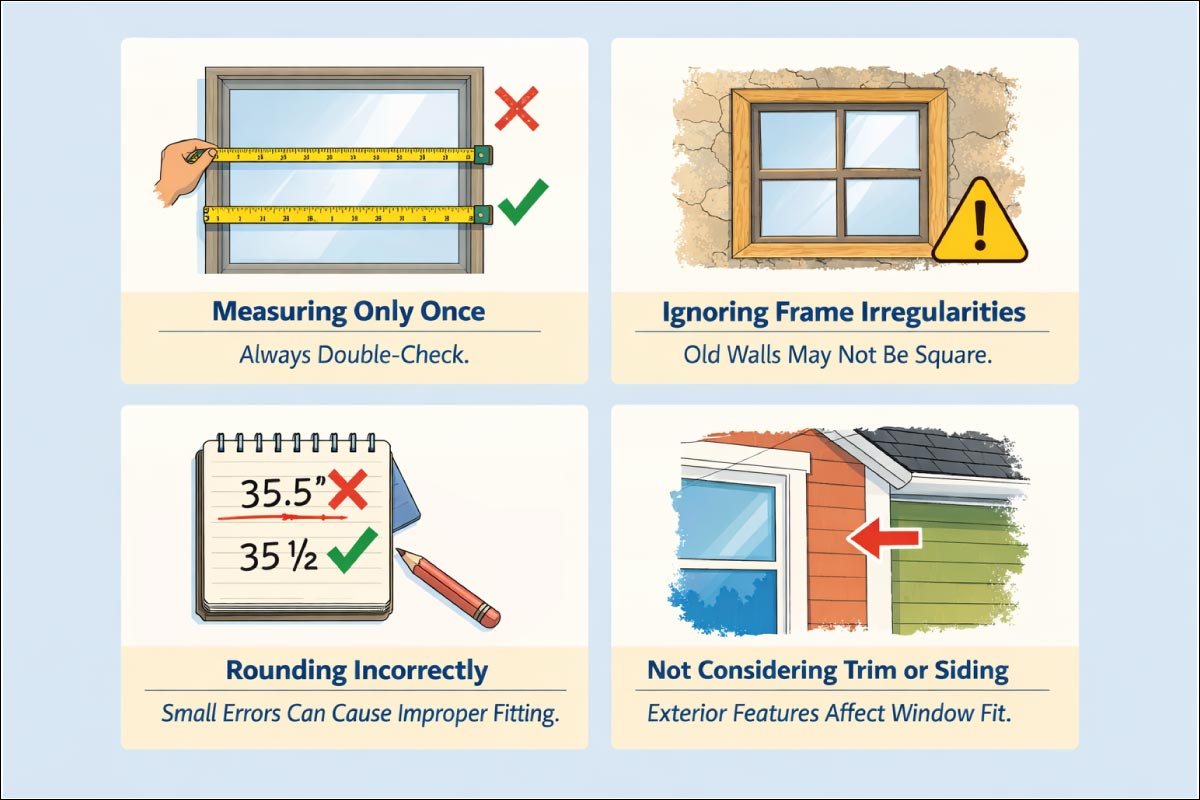
Even small mistakes can compromise your project:
-
Measuring only once: Always double-check.
-
Ignoring frame irregularities: Old walls may not be perfectly square.
-
Rounding incorrectly: Small errors can cause improper fitting.
-
Not considering trim or siding: Exterior features affect window fit.
-
Assuming all windows are standard size: Custom windows require exact measurements.
Tips for Replacement vs. New Construction Windows
Measuring for replacement and new construction windows requires different approaches to ensure a precise fit. Understanding the distinctions prevents installation issues, gaps, or costly modifications. Following proper measurement techniques for each type guarantees smooth installation, optimal energy efficiency, and a professional, visually balanced result.
-
Replacement Windows: Measure inside frame width, height, and depth. Consider frame material and sash type.
-
New Construction: Measure rough opening width and height, allowing extra space for insulation and framing adjustments.
Pro Tip: For replacements, always check if the manufacturer specifies exact measurement instructions—this can vary by window type.
Final Recommendations
Accurate window measurement is the key to a successful installation and long-term performance. Following best practices, double-checking dimensions, and keeping detailed records helps avoid costly mistakes. Proper planning, combined with professional guidance when needed, ensures your windows are functional, energy-efficient, and visually appealing.
-
Always measure multiple times for accuracy.
-
Consider energy efficiency and insulation requirements.
-
Use tables and standards as a guideline but verify actual measurements.
-
Keep a detailed record including notes, sketches, and photos.
-
Consult a professional installer if the window is non-standard or if you’re unsure.